The original plan was to get this blog up and running on a weekly basis after the first of the year. I started early mainly because I wanted to see if I could get it to work and look the way I wanted. So far so good.
So on to the plan ...
This week and next week I will feature what artists call WIP or Work In Progress. As an artist I find WIPs to be beneficial for a number of reasons. First, it's interesting to see how an artist approaches their subject. Second, I enjoy seeing how the piece of work goes from one stage to the next. Third, if there's explanation on how Step One moved on to Step Two, then it becomes educational. And, really, that's the most important thing for me as an artist. How did they do that? What were they thinking when they did that? Why did they do that then?
When I assembled the photos for this week's session, I realized I had 13 photos. Not sure if that many will be helpful at all or if it will be overkill. Based upon your reaction, I will use the same or less the next time I do this. (That's assuming, of course, anyone is actually reading this! LOL)
This WIP will be a pastel painting that i recently finished called "These Boots Are Made for Working." The setup includes a small tabletop desk easel and the surface taped at the bottom and clipped at the top to a piece of masonite board. On the table underneath the easel, I have a disposable underpad that can be purchased at medical supply stores or a pharmacy. On top of that, right beneath the easel, I have a metal tray, not unlike a cookie tray. I have that "lined" with a couple paper towels. The tray catches the pastel dust that falls down from the painting and it also is a handy spot to put my pastels on as I use them. That way I can keep track of what colors I'm using.
For the most part, I used Prismacolor NuPastel pastel sticks, Rembrandt pastel sticks, Unison Pastels and Great American Pastels -- which are, incidentally, made right here in Cincinnati.
So, on with the show ...
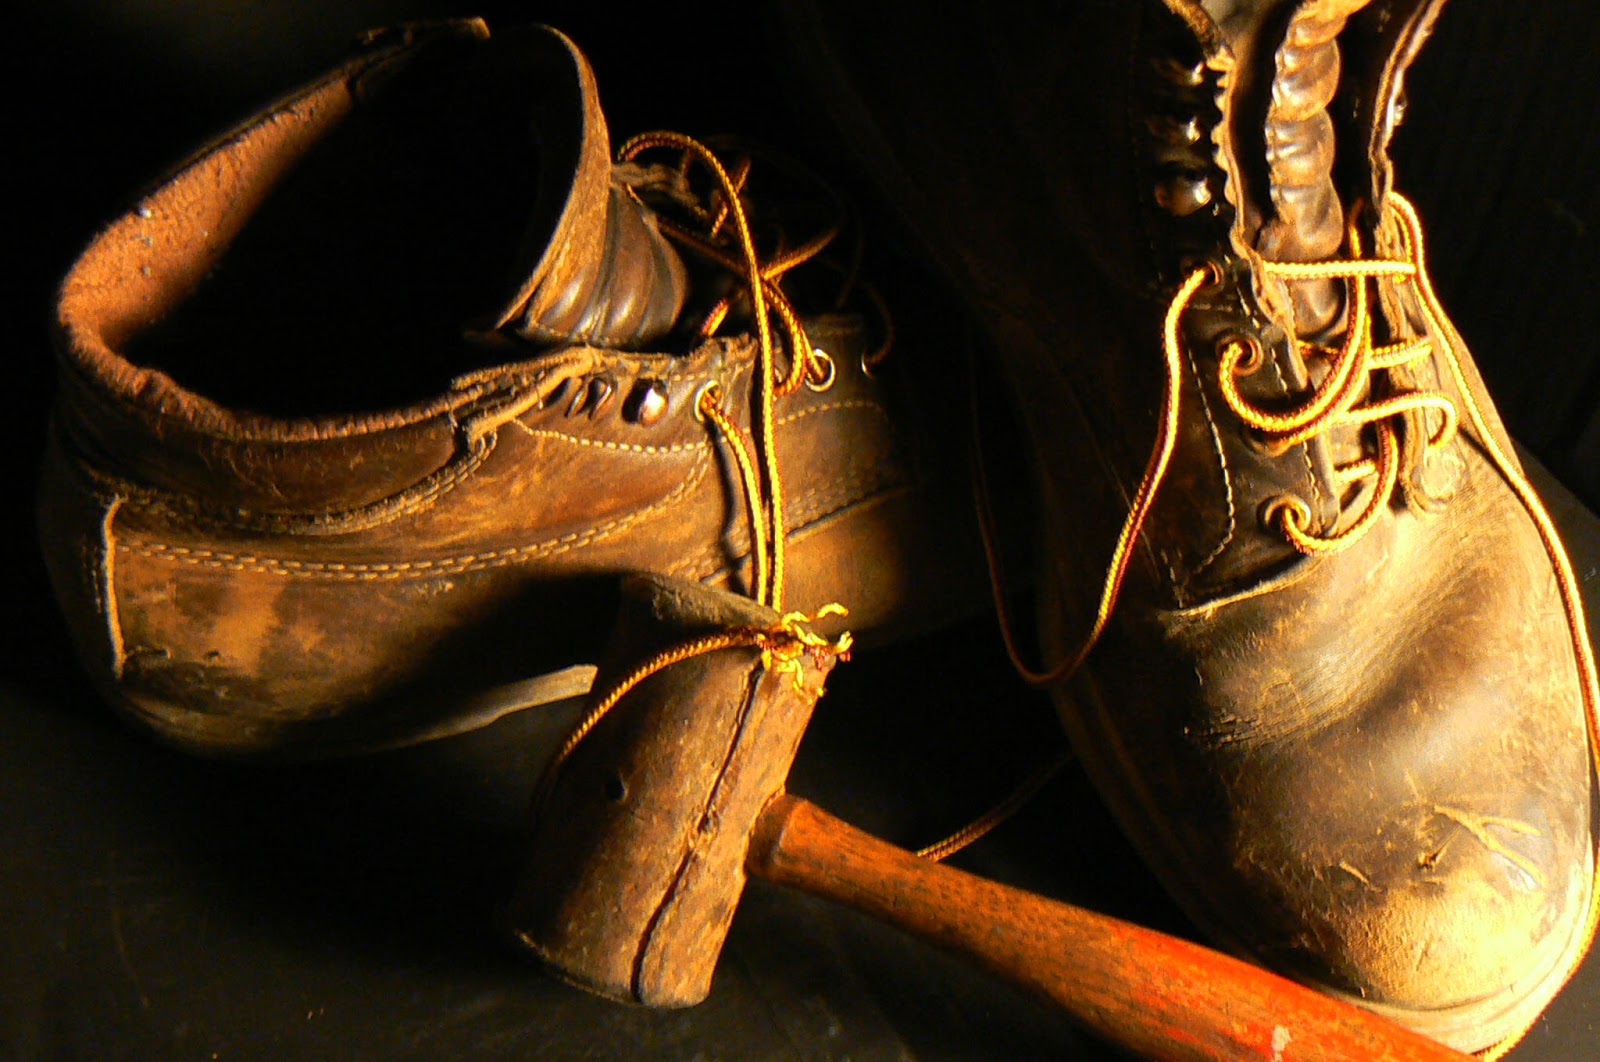 |
| Original photo |
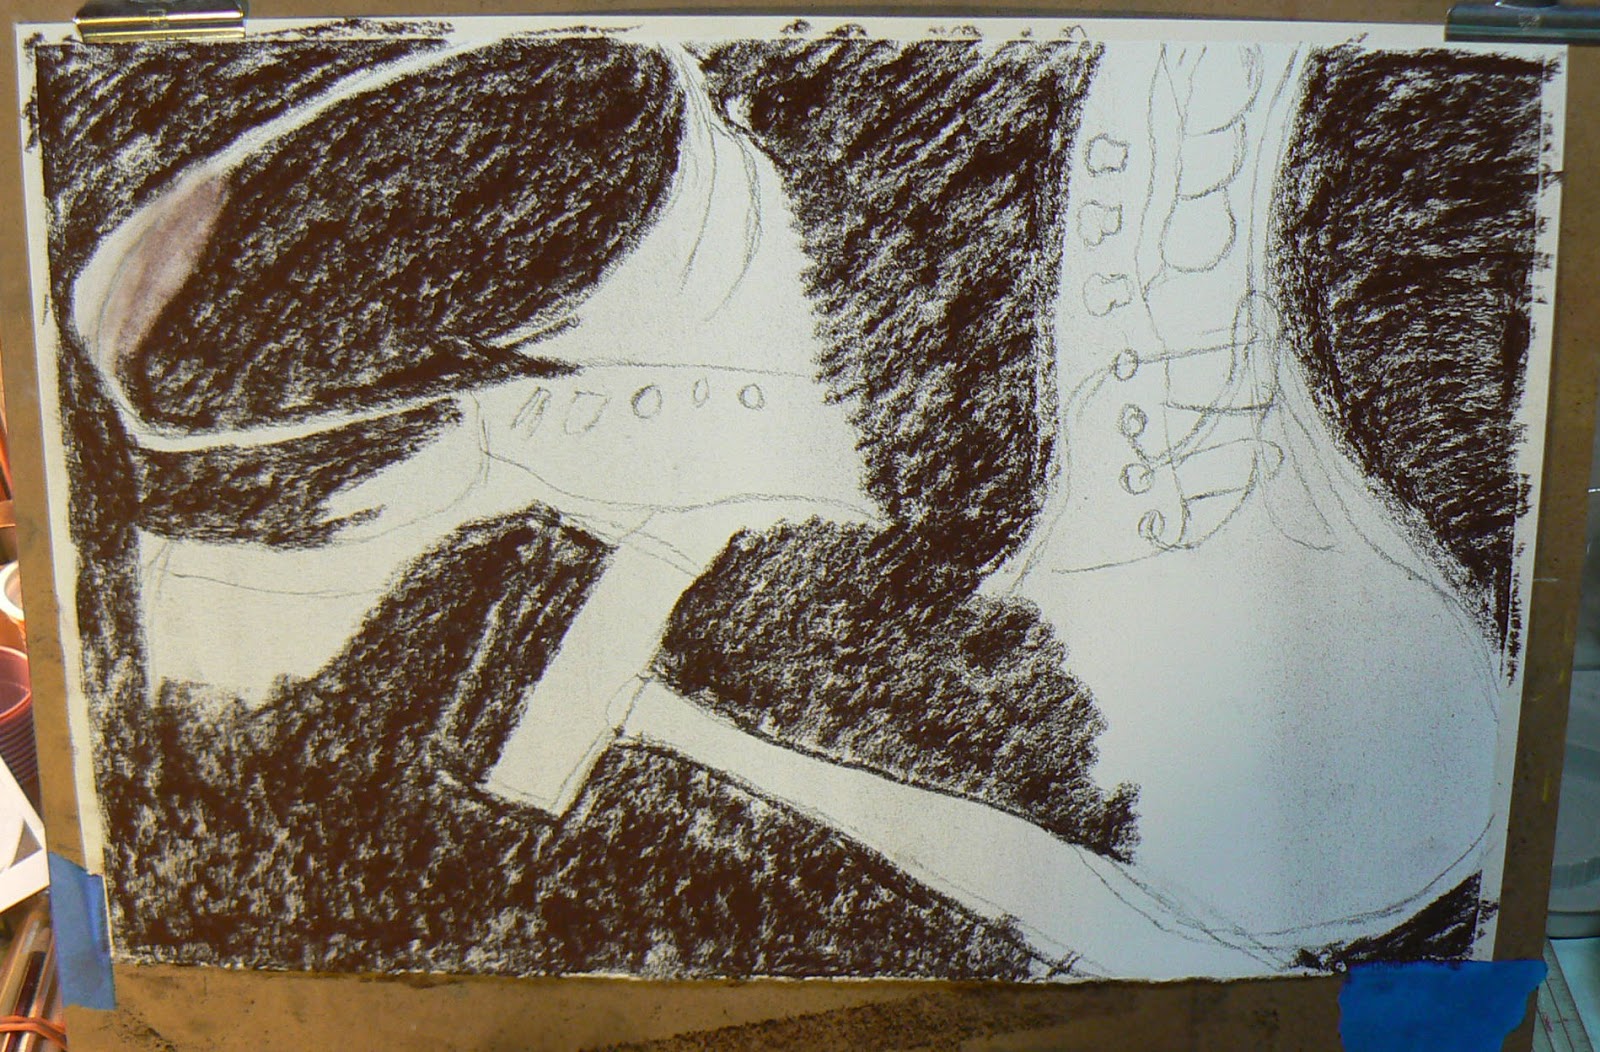 |
| Step One |
The first step was to rough sketch the original drawing with charcoal. I followed this up by painting in the dark areas with a Brown Umber Prismacolor pastel stick.
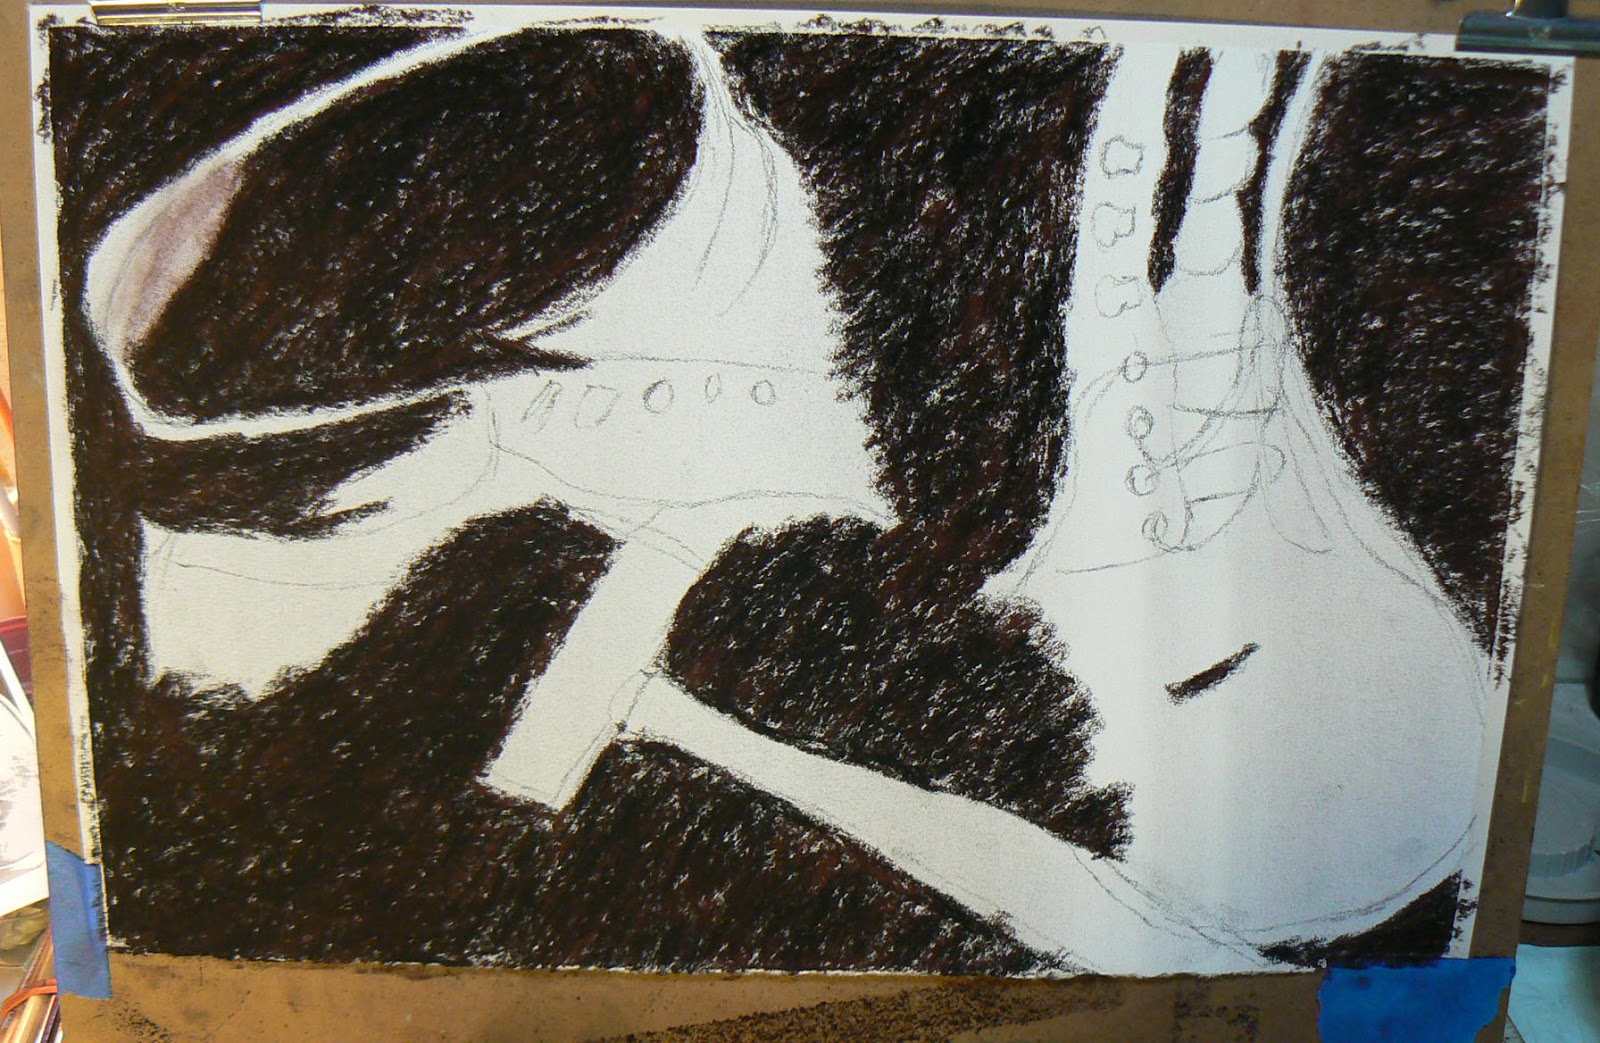 | ||||
| Step Two |
Step two was to follow essentially the same path of the brown pastel, only this time I used a Black Prismacolor pastel stick. Why not use Black first? I believe the darker brown initially provides more depth to the black.
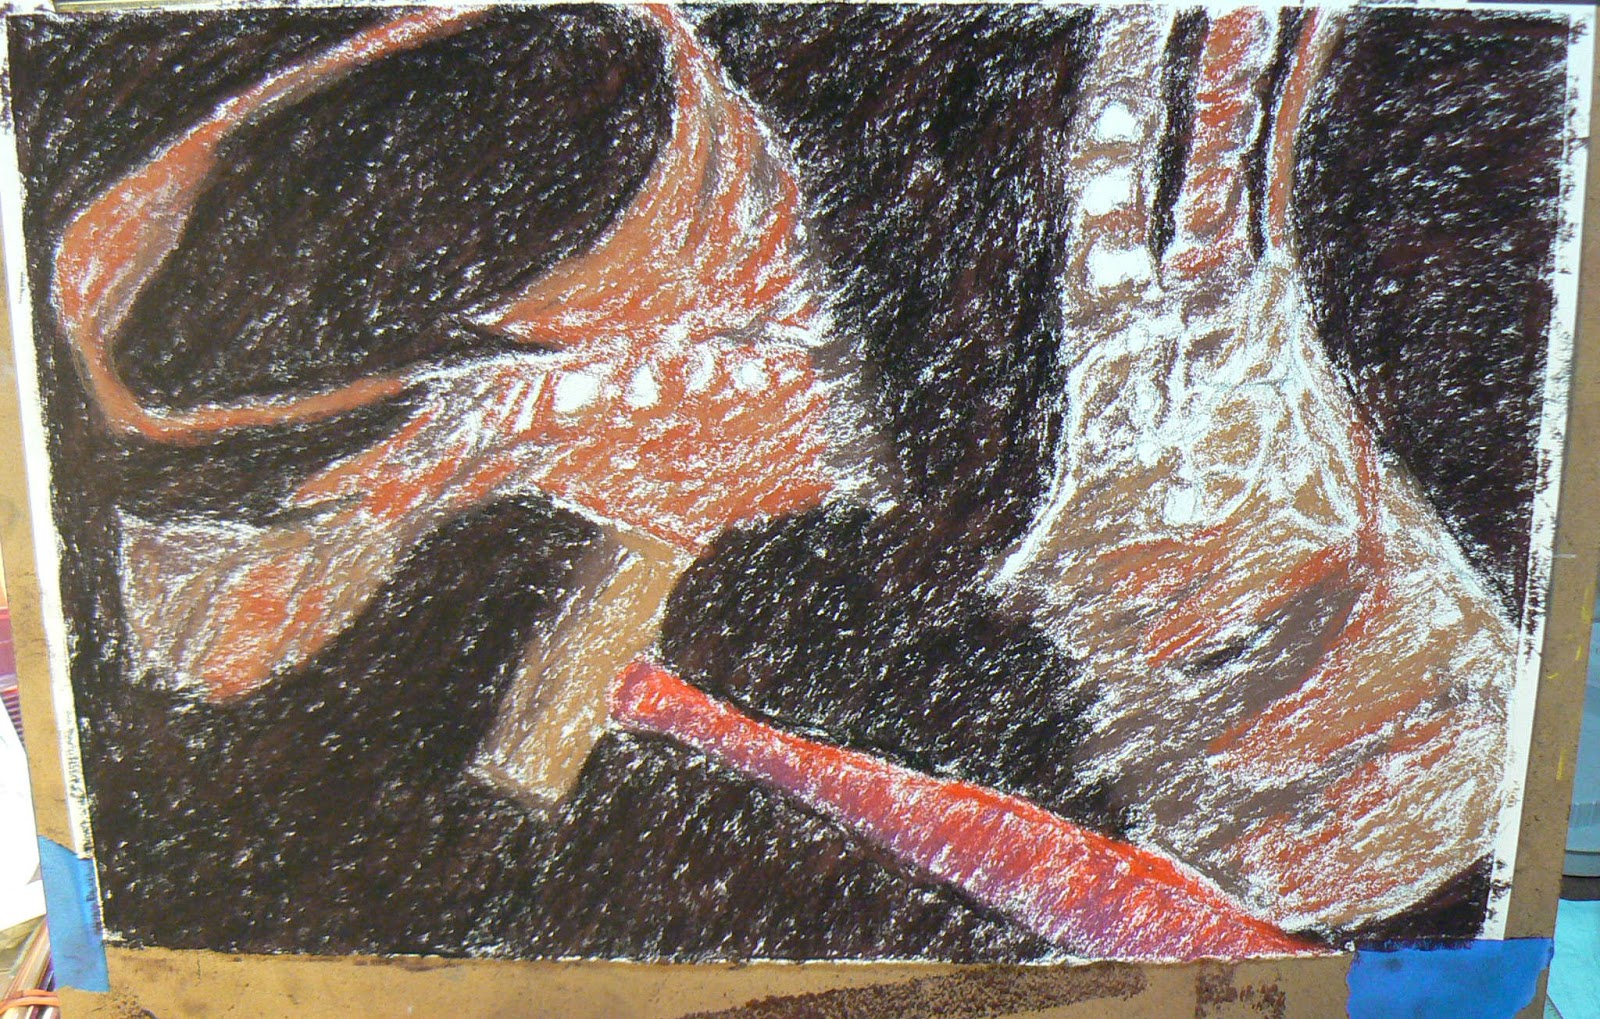 |
| Step Three |
In Stage Three, I begin to introduce more color. Again, all I am using at this point are Prismacolor pastel sticks. Colors at this stage included Burnt Sienna, Sepia, Light Umber, Yellow Ochre, Red and a magenta-purple (Maroon or Plum) on the handle of the hammer.
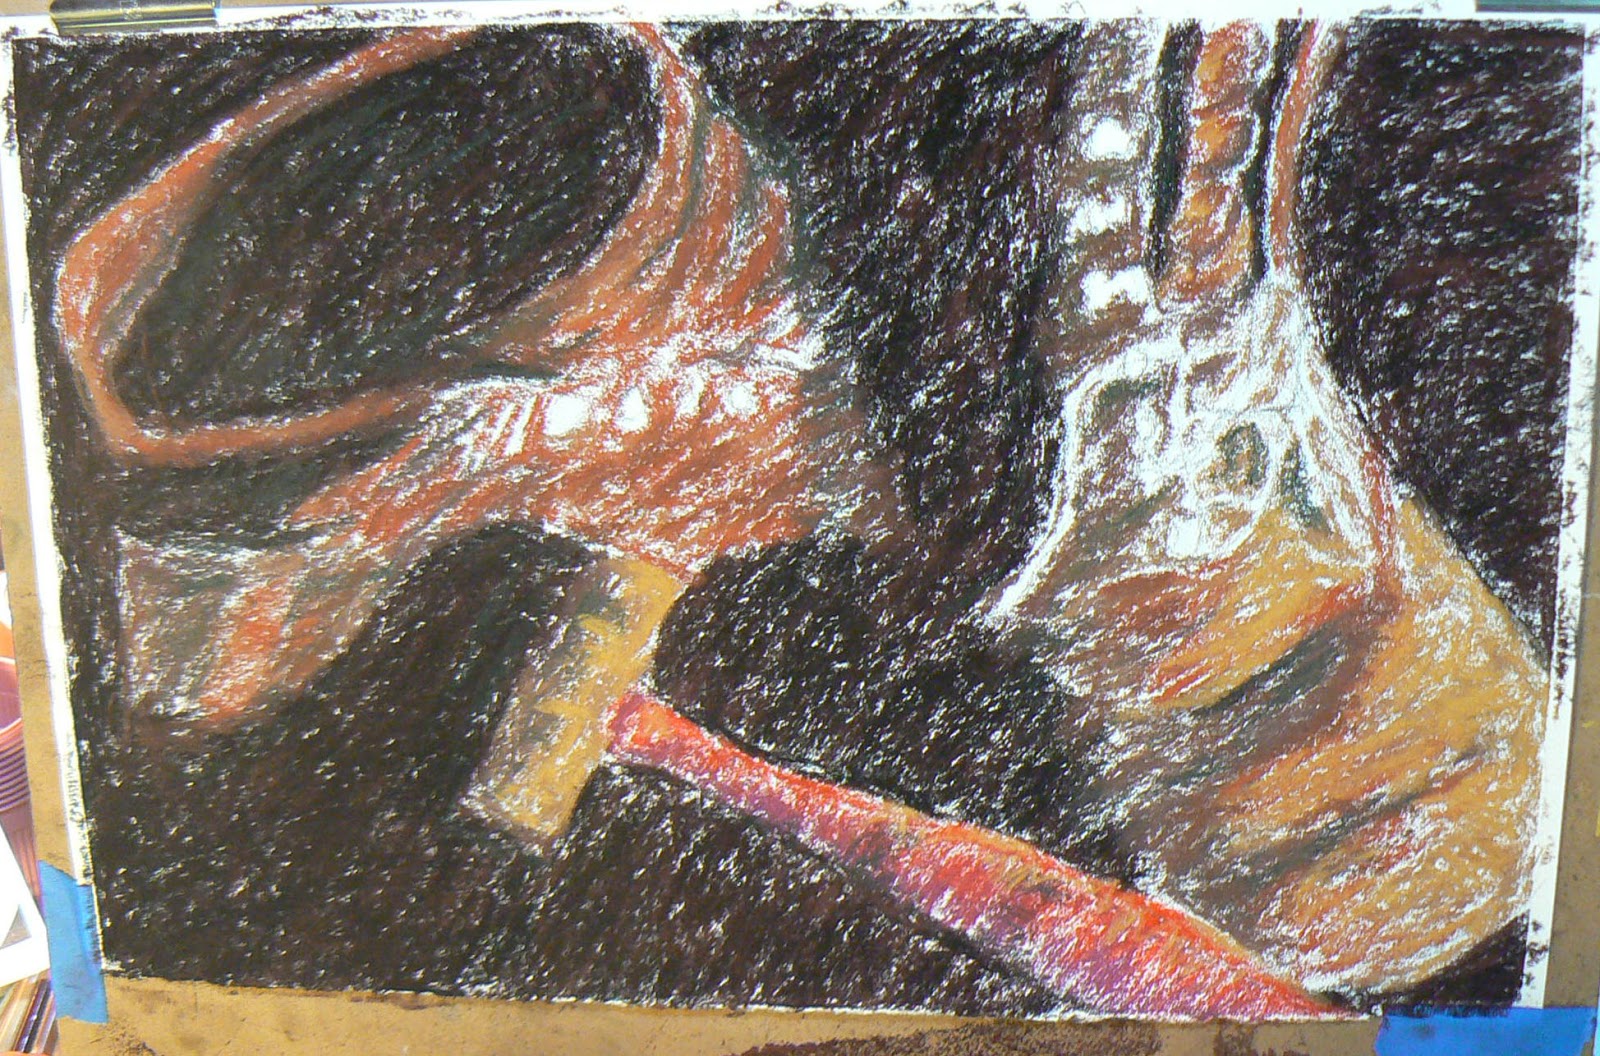 |
| Step Four |
More color is being added in Step Four, particularly with Yellow Ochre and an addition of Indian Red around the tongue of the boot on the right. As you can see, I've left colorless the areas where I intended to add the boot strings and the eyelets.
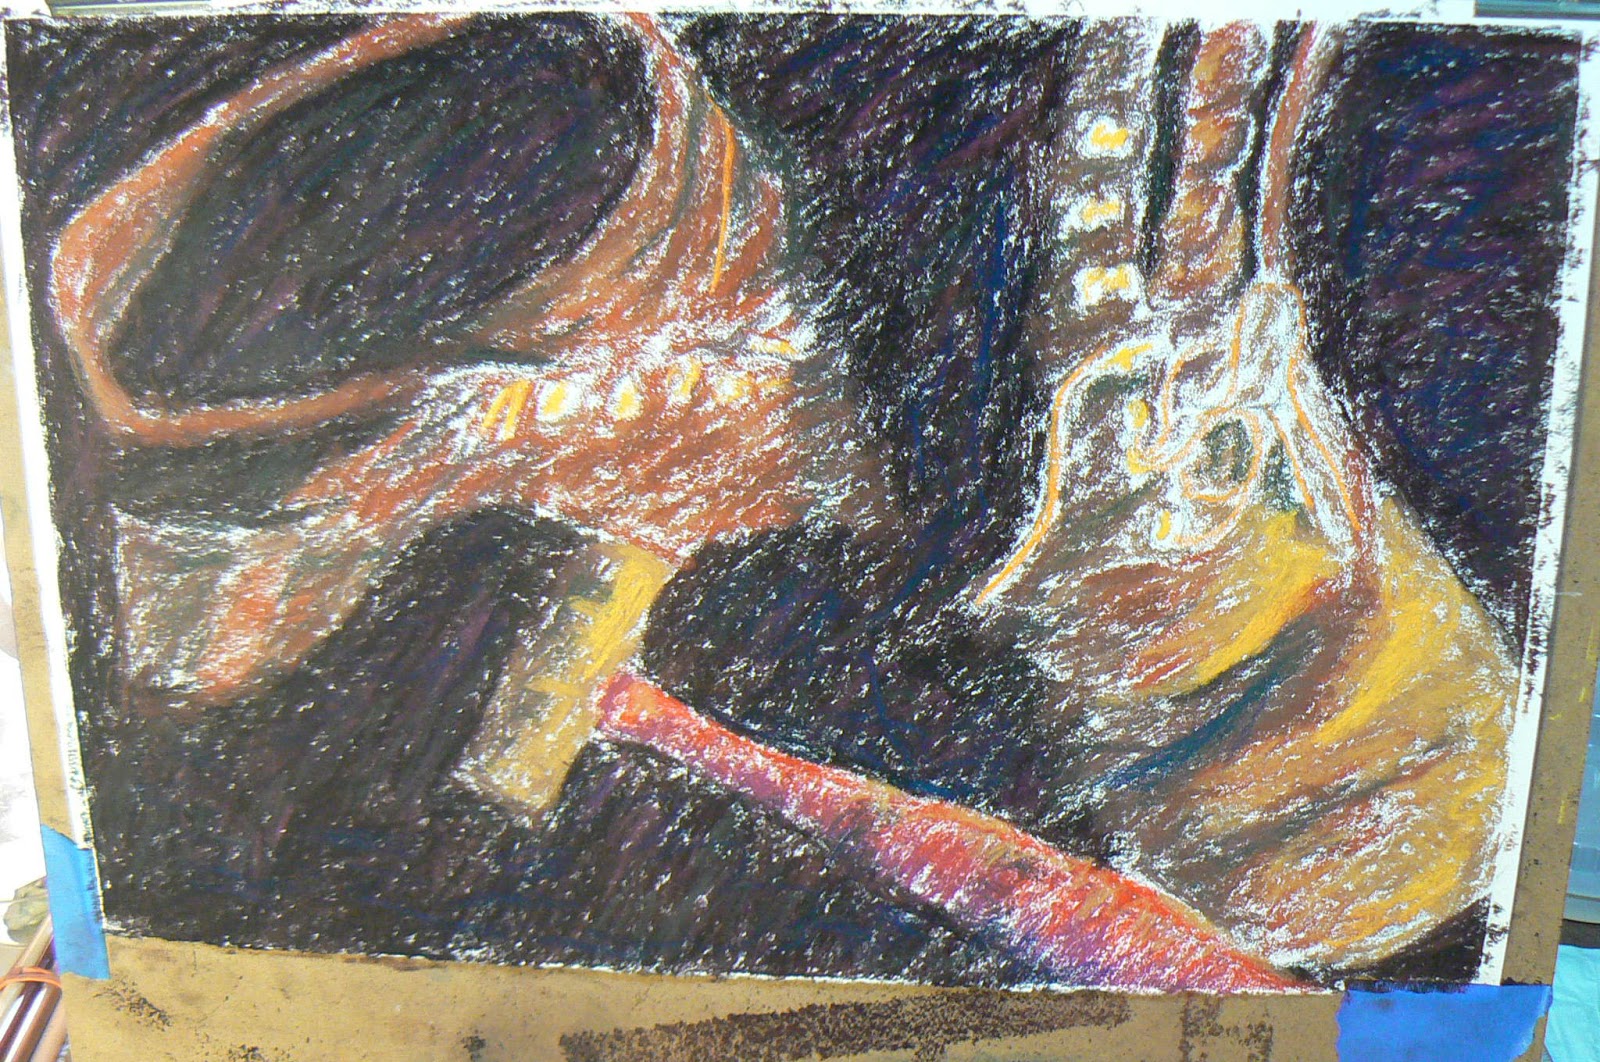 |
| Stage Five |
In this step, I've added Cadmium Yellow Deep in areas that I want to highlight. I've also introduced that same color to the eyelets. There are a couple streaks of Bottle Green in there too. I also added some Blue Violet in the backround to give the black more depth. I roughed in with Yellow Ochre a couple of the shoestrings, but I knew at this stage that where they are now is not necessarily where they will be at the end. Artists make adjustments. (Another future blog topic)
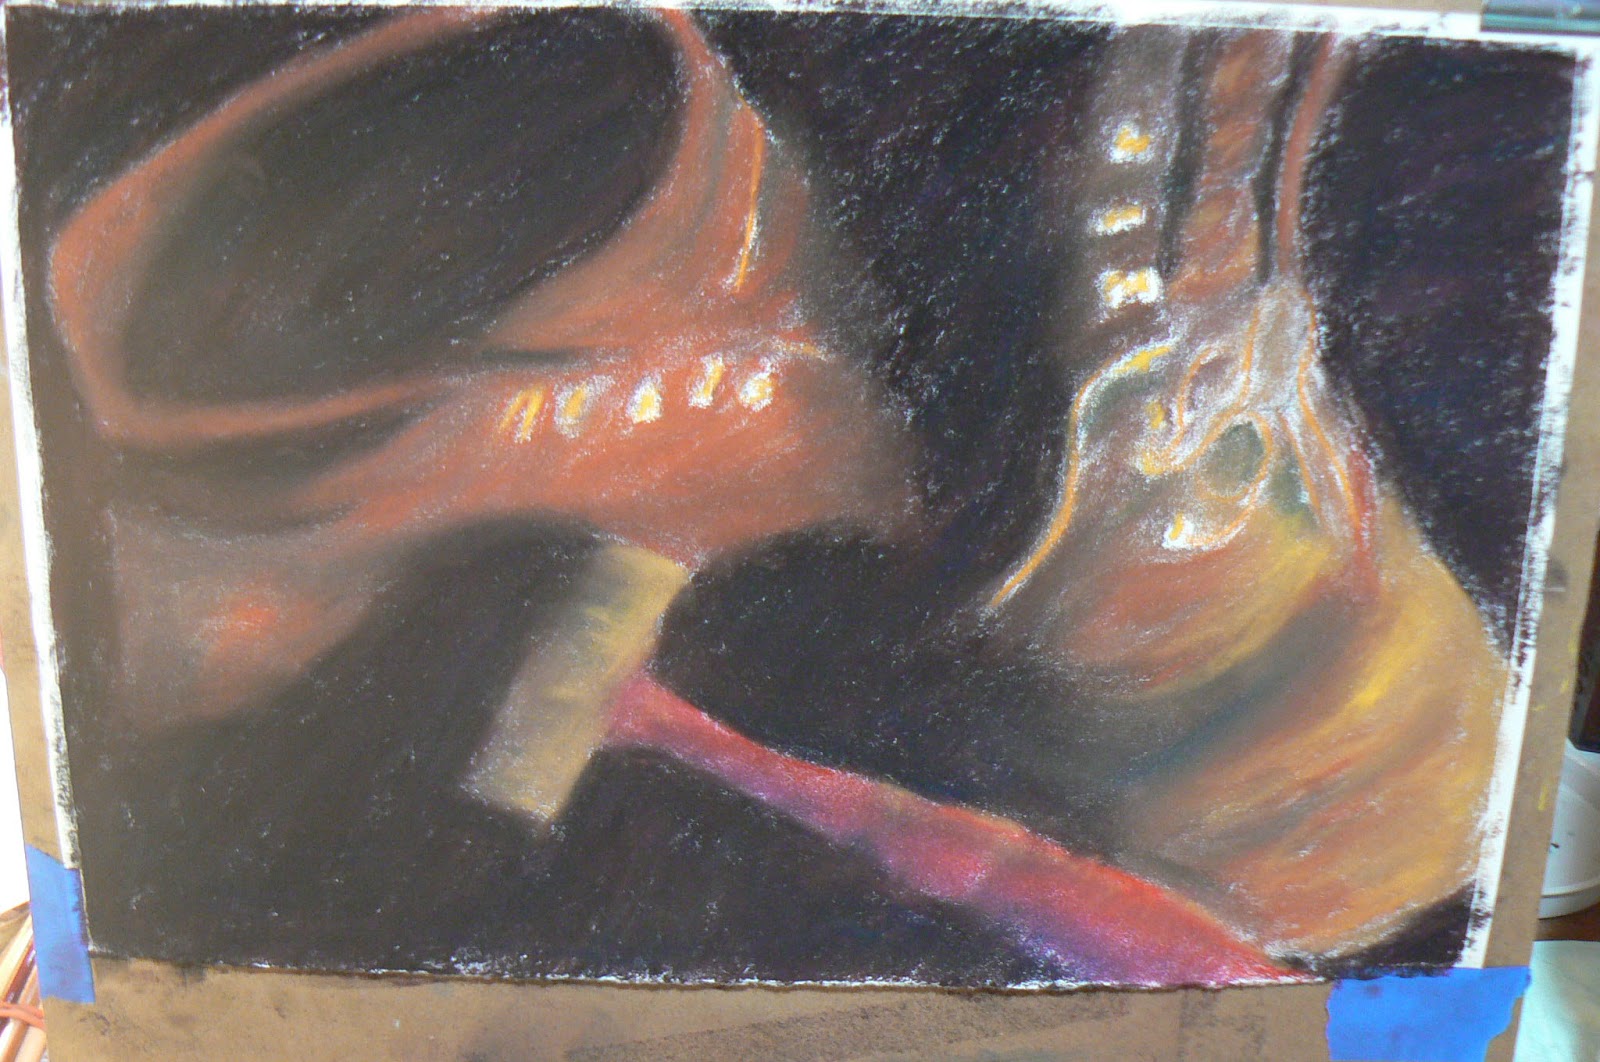 |
| Stage Six |
This is the fun part. Blending time. My favorite blending tools are my index fingers and my little fingers. I am indeed blending the entire painting as this point. This will be the only time that I will blend the entire painting. And, for the most part, there would be very little blending done with my fingers from here to the end. The rest of the blending that takes place is from the process of putting on more layers of pastel.
Blending, for me at least, is enjoyable. It's like being a kid again and finger painting. Only this time, you have a sanded surface under the layers of color.
The vitally important thing you have to remember throughout all of this -- and especially during the finger blending stage -- is to keep your fingers as clean from pigment as possible. So you blend one area first (I started with the dark area and probably won't do that again), then wipe off your hands thoroughly and then blend another area (rinse and repeat) and so forth until you have the blended painting where you want it.
Next week we finish the WIP and show the final painting.
Till then ... Keep Arting!
PS -- I have opened an Etsy Art Store! The link can be found on the Blog. You can also "Like" me on my new Facebook page at Mbpgrafix!
this is a wonderful and very interesting post. I just bought some different pastels at Michaels yesterday and I don't know where to start they are very chalky and different from the oil pastels, I used previously - But you gave me some courage to try to make use of them now.
ReplyDeleteThanks I'll be back to see the results and again thank you for inspiring me.
-Kat-